How to: Create a github repository in enterprise
Create local repository with Github Desktop
- Open Github Desktop, click File, then click New Repository.
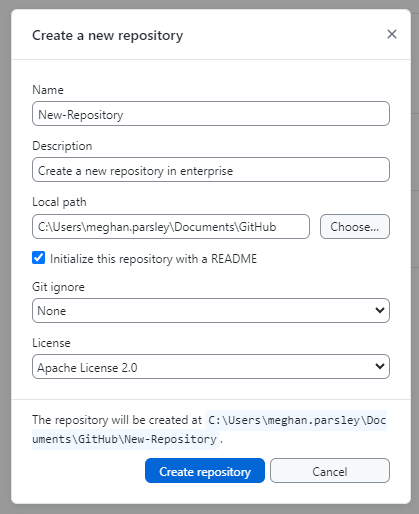
- In the Create a new repository popup window, fill in your repository name and description. Select the local path for your repository folder
This process will create a new folder in the directory you choose and call it your repository name
The default directory is in your Documents/Github folder on your computer
It will likely make more sense to choose the folder that houses the rest of your project files as the local path for your github repository folder so all project items are in one place.
- You may drag and drop the repository folder to another location later, but you cannot just move the files within the folder to another location (there are hidden files that must go with it).
- Check the box to Initialize this repository with a README
- Choose a Git ignore for your repository if you want one. More details on gitignore files can be found on the Github Resources tab.
- Select the Apache License 2.0
- Click Create repository. Note: this creates a local copy of your repository, it is not yet published on github.com or on enterprise. Continue below!
Your repository should now show up in the drop down menu at the top left of your github desktop window.
Add files and update the README
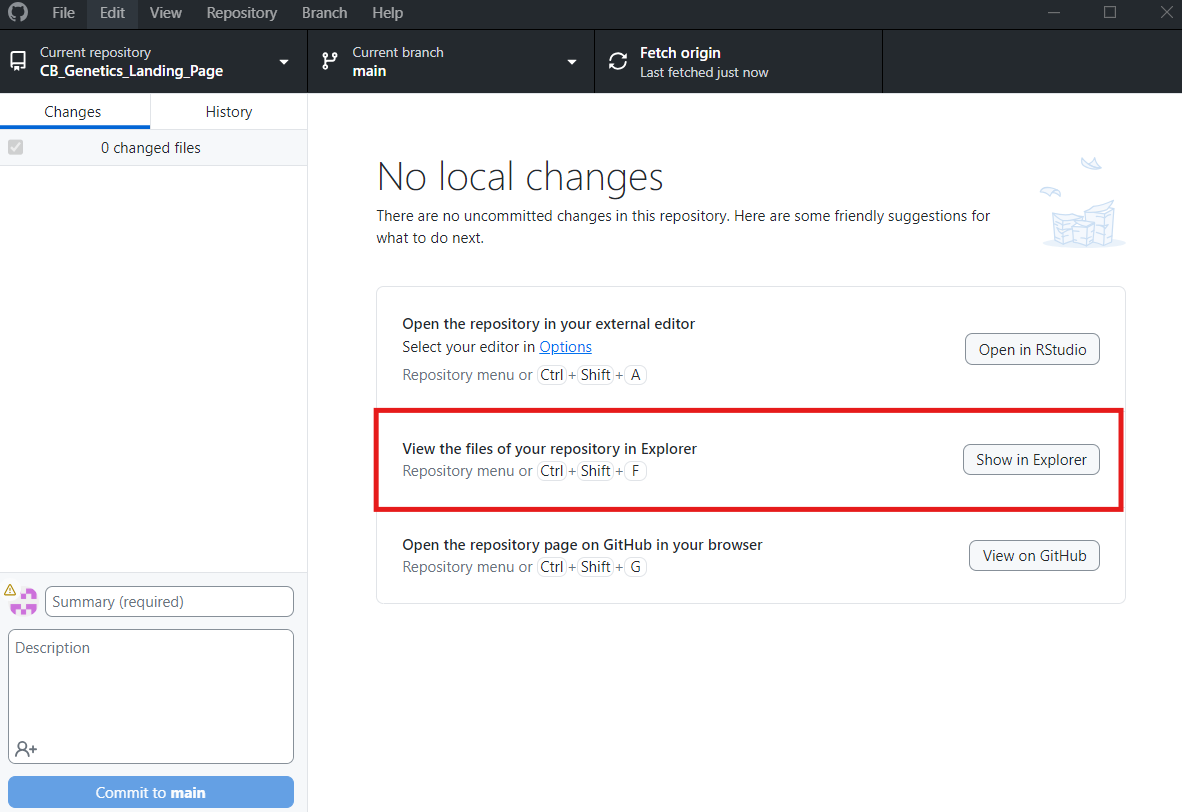
You now have a local copy of your github repository at the file path you specified. Your repository folder should have the same name as your repository name. If you have forgotten where this is, you can toggle to the repository in the top left corner of the Github desktop window and click Show in Explorer in the center of the window (this may be slightly different wording on a mac).

You can now add files to your repository folder by dragging and dropping them from another file on your computer. It is recommended NOT to duplicate or create a copy of any files in this folder as this will cause confusion down the road. This will be your new working place for this project analysis! For a tutorial, see How to: Use Github Desktop.
Note: Large files (like fastq) cannot be uploaded to github and should not be in your repository folder unless using a gitignore file.
Update your README file to provide a description of the repository. Suggested components include:
Primary contact(s)
Citation/Reference/DOI
Objective
Methods
Major Results
Disclaimer
For more README details, see the Github Resources tab.
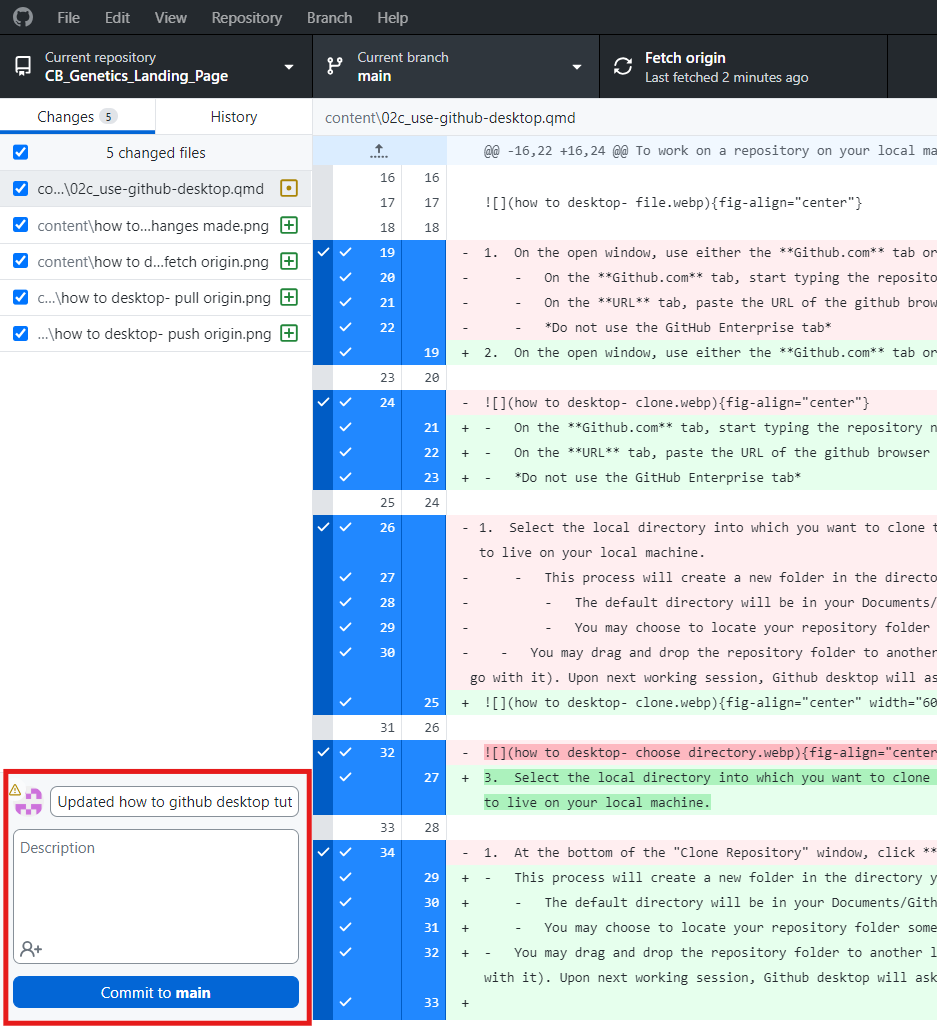
Any file additions or changes to the README must now be committed. Navigate back to Github Desktop- any edits you made to the repository folder should show up on the changes tab.

Type a commit message stating what work you did and click Commit to Main.
Publish repository to Enterprise
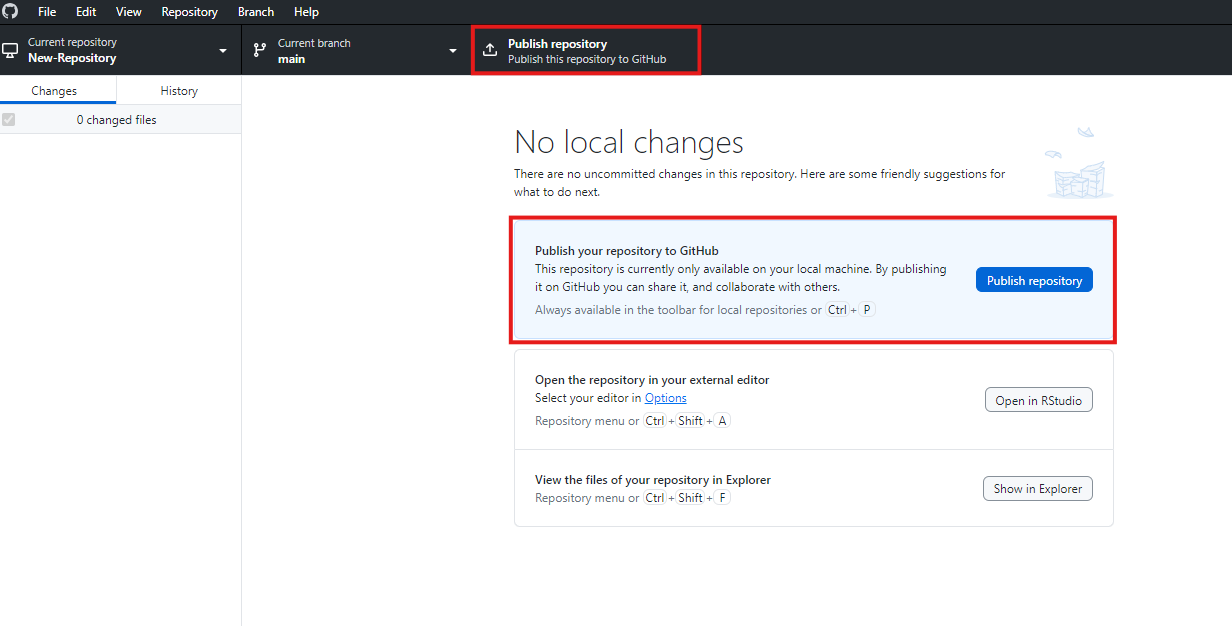
Once you have made and committed some changes, you are ready to publish your repository to github.com in the NWFSC enterprise organization. Only after the repository is published can it be shared and collaborated on.
- On the top bar or in the center of the screen click Publish repository
- In the Publish repository window, stay in the Github.com tab, do not go to the Github Enterprise tab!
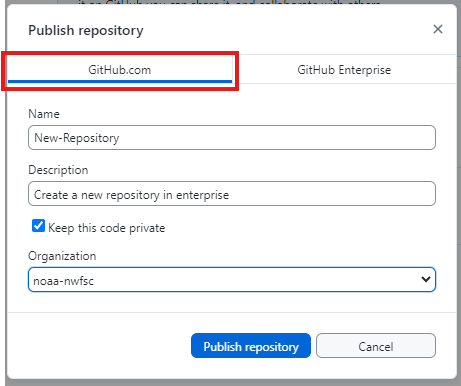
- Update the repository name and description if desired (recommend keeping these the same to reduce confusion).
- Decide whether to keep the code private (this can be changed later)
- Under “Organization” select noaa-nwfsc (this will publish the repository in enterprise!)
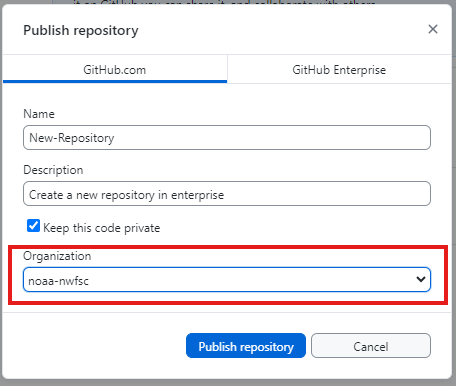
- Click Publish repository
You can now navigate to your new repository on github.com! Do this to make sure your repository published to the noaa-nwfsc enterprise organization correctly (you will want to do this for the next few steps anyway!).
Add teams and topics to your repository
Assign the CB-Genetics team to your repository
Assigning the CB-Genetics team to your repository keeps our group’s work organized and easy to find within the NWFSC enterprise organization. Simply navigate to the NWFSC enterprise organization, click on the Teams tab, expand the CB team to find the CB-Genetics team within it, then click on Repositories.
To assign the CB-Genetics team to your repository and add it to the list, follow the instructions below:
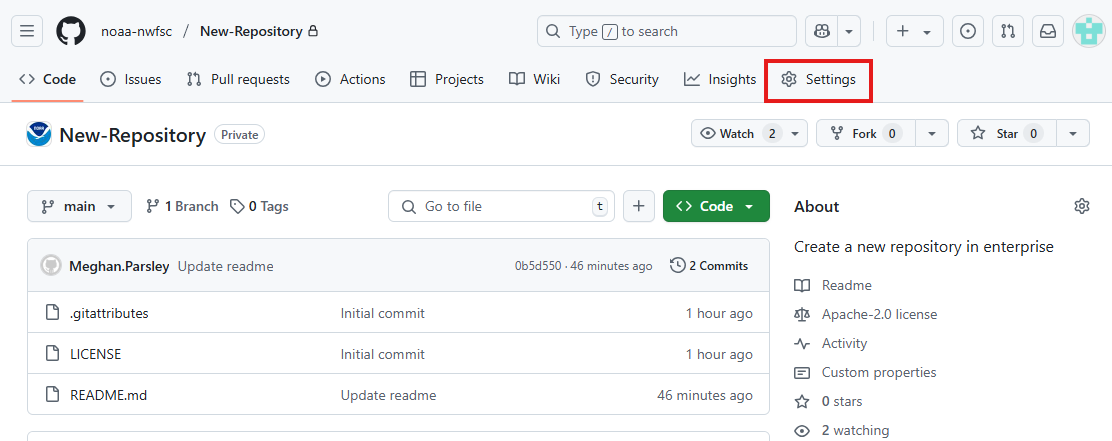
- On github remote (github.com), navigate to the main page of the repository
- In the heading, click Settings
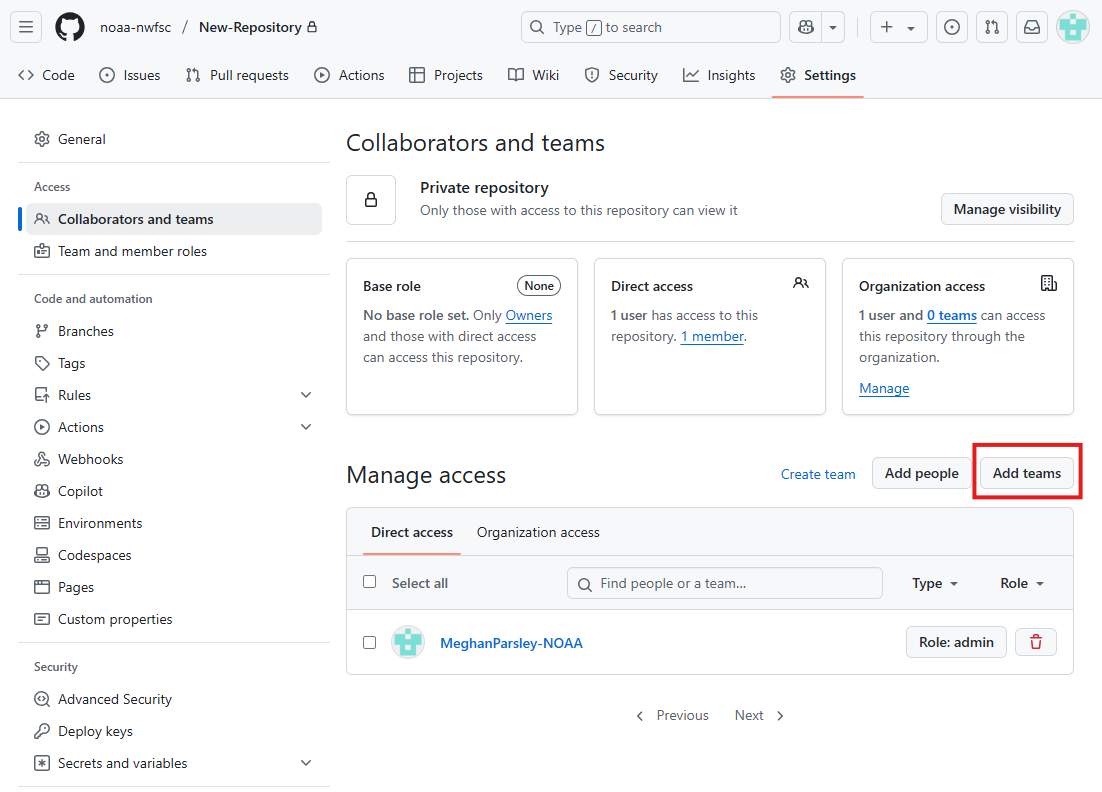
- Under the “Access” heading on the left, click Collaborators and teams
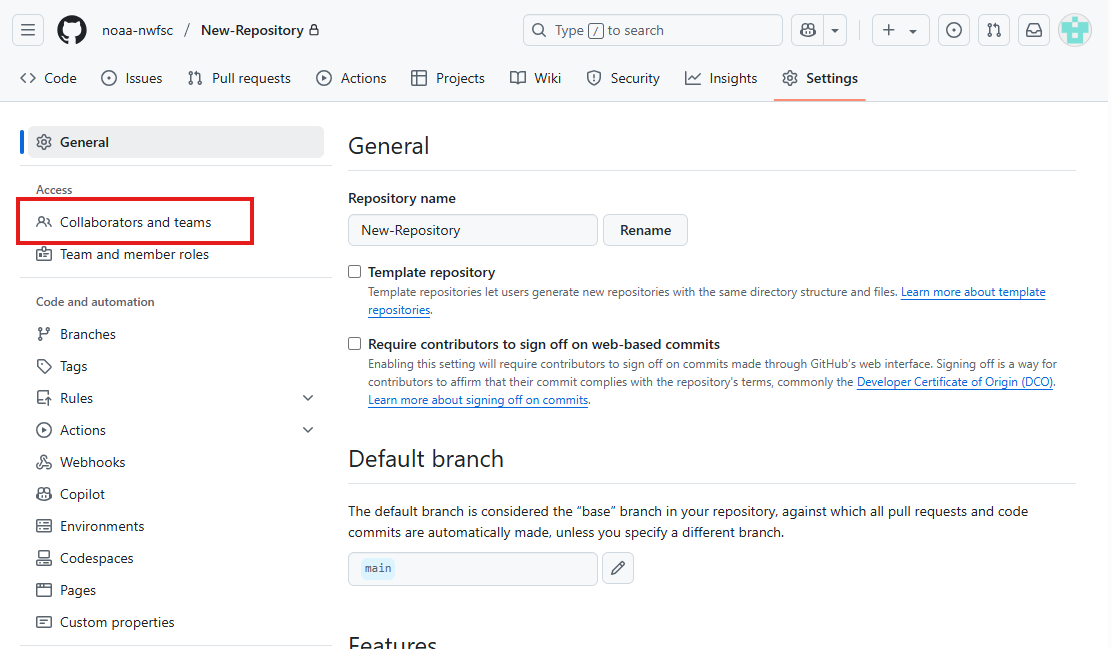
- Scroll to the “Manage access” heading and click Add teams
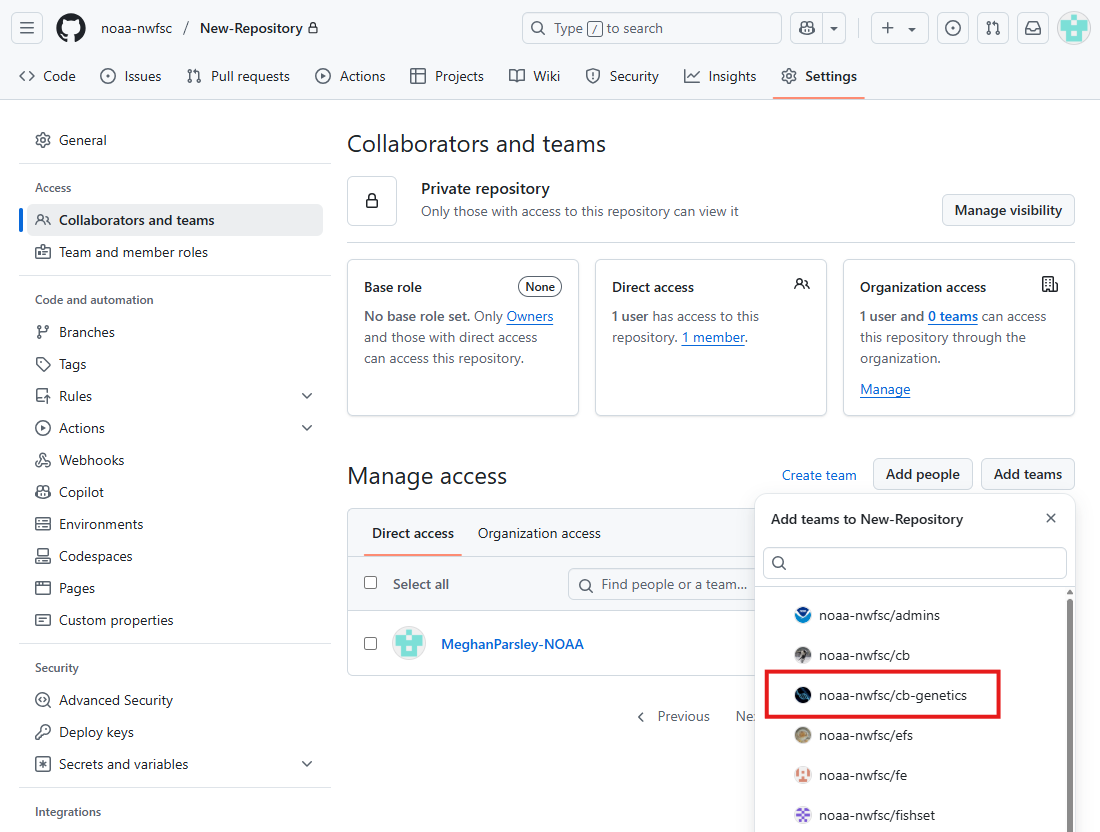
- Start typing noaa-nwfsc/cb-genetics and select it from the dropdown menu
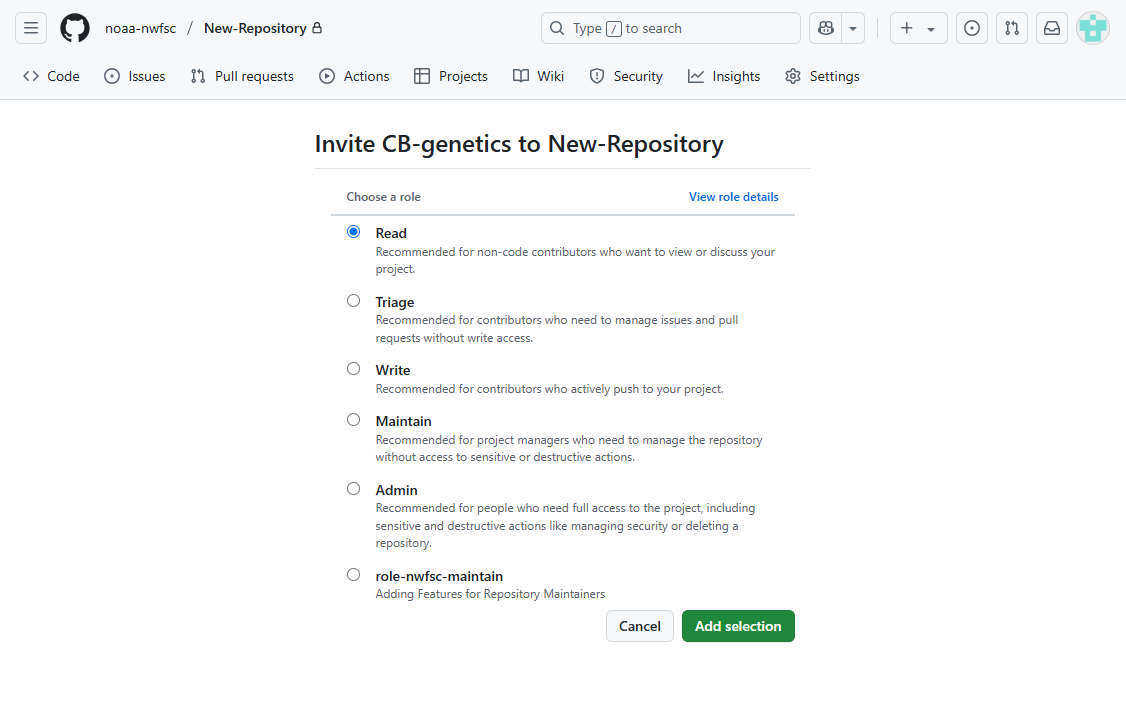
- Determine role details for the CB-Genetics team for your repository (this can be changed at any time). Click Add selection
Add the “nwfsc-cb-genetics” topic to your repository
Topics are used in Github like hashtags are used in social media. It is another way to categorize repositories and organize them. For example, the NWFSC Github Organization landing page has a link to all repositories with the nwfsc-cb-genetics topic. The “nwfsc-cb-genetics” topic should be added to all repositories in our group.
- On Github remote (github.com), navigate to the main page of the repository
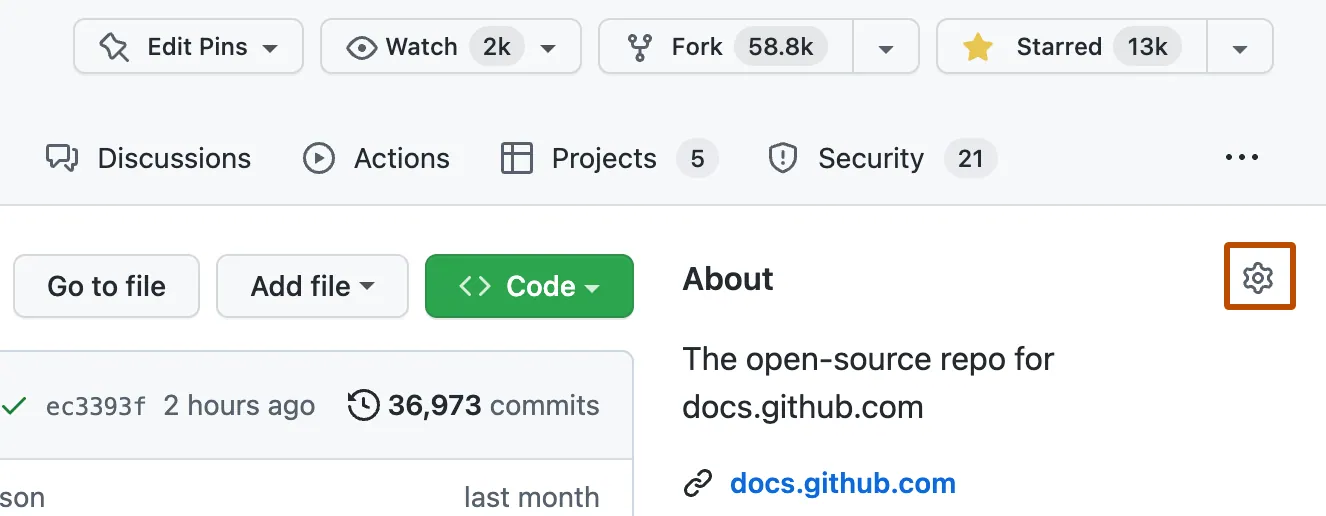
- In the top right corner of the page, to the right of “About”, click the gear symbol
- Under “Topics” start to type nwfsc-cb-genetics, click the matching topic from the drop down menu
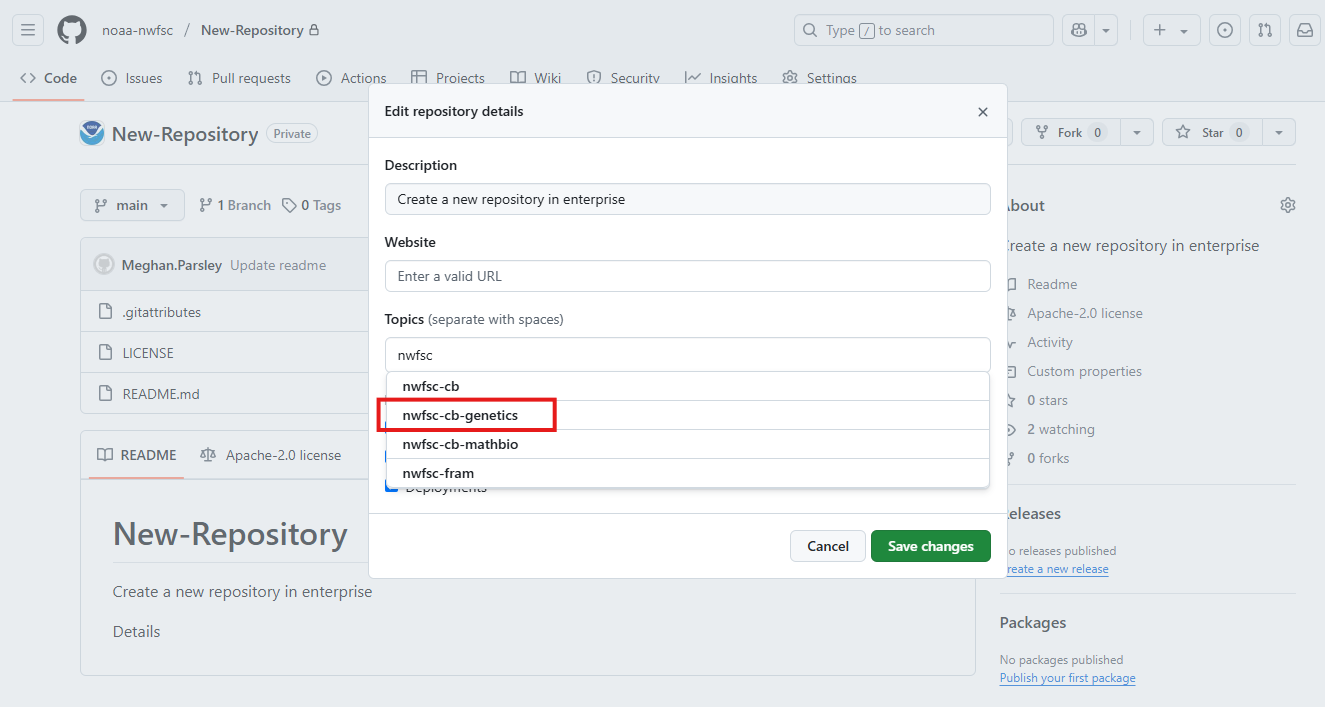
- Click Save changes
How to duplicate a repository into a new one
There may be instances where you wish to duplicate a repository of yours or someone else’s into a new repository.
The easiest way to do this is to download the script or analysis file(s) from that repository and start a new one with the instructions above.
Importing a repository may be an option to create a complete duplicate of another repository, with the caveat that this will duplicate all files that may not be necessary anyway (data files, etc.). Follow github instructions on importing a repository if you are interested in this option.